In this article, we have discussed the ways using which you can install Hyper-V on Windows 10 Home. Windows 10 has been working on its own Virtual Machine in order to bring a built-in VM capability on Windows. Similar to several otherVMapps, Hyper-V allows users to run a vast number of operating systems on top of Windows 10. While it’s magnificent to use such a VM capability, the only issue with Hyper-V is that it is not available on Windows 10 Home. So, we have come up with a workaround that will let you install Hyper-V on your Windows 10 Home PC. Follow the steps mentioned below for the same:
Install Hyper-V on Windows 10 Home
To install Hyper-V on Windows 10 Home, you need to follow the steps mentioned below:
- First, download the batch file in order to turn on Hyper-V for your Windows 10 Home. TheWindows 10batch file is developed bythe developers at Microsoft Virtualization.
- Further, choose “Run as Administrator” by right-clicking on the batch file.
- The Power Shell/Command Prompt window will open, and the installation of Hyper-V will begin on Windows 10 Home. Please make sure you are connected to the internet in order to enable this feature.
- After installing Hyper-V, you need to restart your PC. Further, press together “Windows” and “R” keys simultaneously in order to open the Run window.
- Now, type optionalfeatures.exe and press enter.
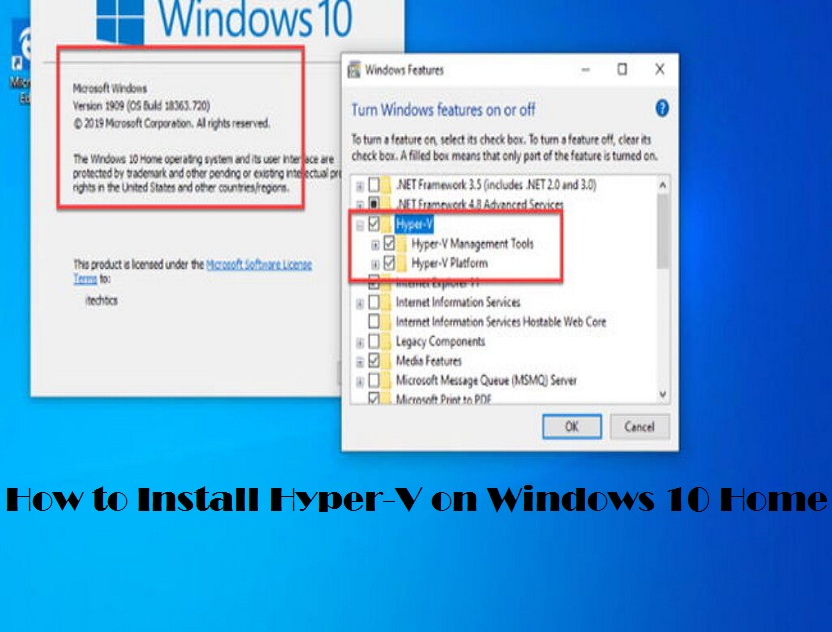
- The Windows Features screen will get displayed on your screen. Now, you need to scroll below to enable all the Hyper-V checkboxes and press OK to continue. This will initiate the installation of the necessary packages, and further, it will ask you to restart your PC after the installation is completed.
- Hyper-V will get activated on your Windows 10 Home once the installation finishes up. Now you can simplypressthe Windows key and search for “Hyper-V.” Doing this will show you the results from which you need to go to Hyper-V and open it.
- In case Hyper-V doesn’t appear in the search result, you need to open the Run window andtype virtmgmt.msc, and press enter. Doing this will open Hyper-V Manager on your Windows 10 Home PC.
So, these were the steps using which you can enable Hyper-V on your Windows 10 and create virtual machines. That’s all from us for now. Please let us know in the comment sectionif you face facing any issues.
Wilder Zayn is a self-professed security expert; he has been making the people aware of the security threats. His passion is to write about Cyber security,cryptography, malware, social engineering, internet and new media. He writes office.com/setup security products.
Source: How to Install Hyper-V on Windows 10 Home


No comments:
Post a Comment