Wednesday 24 February 2021

How to Merge Disk Partitions in Windows 10

 In this article, we have discussed the ways using which you can merge disk partitions in Windows 10. While it always proves to be helpful to obtainvarious partitions on a hard disk for varied uses, it might sometimes be a requirement to merge the disks into one contiguous unit. Whatsoever may be the reason, with the help of the steps listed below, you can merge several partitions into a single unit on your PC. So, if there’s a need to merge disk partitions on your Windows 10 PC, you can go through the instructions listed below. We have listed three steps using which you can carry the task: with the help of “Disk Management” – the built-in Windows tool, using “DiskPart” – a command-line tool, andAOMEI Partition Assistant – a third-party app.

Merge Multiple Hard Disk Partitions in Windows 10

Your Windows 10 PC has a built-in partition management utility using which you can combine or merge several partitions. The built-in tool is called Disk Management. However, third-party tools like AOMEI Partition Assistant can also be used. To merge or combine the disk partitions, you can also make use of “DiskPart” – a command prompt. For each listed method, you getvaried pros andcons. So, this article will tell you which method you exactly need to fulfill the purpose. So,let’s get started with the instructions to merge or combine partitions into one contiguous unit on your Windows 10 PC.

Please be noted that some of the below-mentioned methods lead to complete data loss. So, we recommend you take the backup of your PC first before you proceed further. With that said, let us proceed further to the instructions to merge multiple disk partitions into one on a Windows 10 PC. We have mentioned three methods using which you can accomplish the task. They are as follows:

Using Disk Management (Data Loss)

Using this method will lead to data lossso, you need to create a complete backup of your Windows 10 PC before you proceed further using this method.

  1. Initiate the process by heading over to the Control Panel.
  2. Further, in the control panel settings, you need to look for the option “Disk Management.”
  3. Now, you need to tap on the option “Create and Format Hard Disk Partition,” from the results.
  4. Navigate to the two partitions that need to be merged, and further, delete the one appearing on the right side. For instance, if you want to combine/merge D: and E: drive on your system, you need to first delete E: drive. You can do that by right-clicking on the partition E: and further selecting the option “Delete Volume.”
  5. A warning promptstating “All the data will be lost” will appear on your screen. To continue further, you need to click on “Yes.”
  6. Then, right-tap on the volume D: and further press“Extend Volume.”
  7. The“Extend Volume Wizard” will appear on your screen, using which you can expand the disk as desired.Further, start the process by clicking on “Next.”
  8. Then, agree with the default options and tap on “Next.” Do make sure you don’t change any value.
  9. Finally, press“Finish” so as to completely merge the two partitions into a single disk. That’s it.

Using Third-party App (Without Data Loss)

We are going touse AOMEI Partition Assistant so that you can understand better the instructions listed in this method.

  1. First, you need to download and install AOMEI Partition Assistant. You can download the app for free.
  2. Once you have downloaded it, right-click on that partition whose size needs to be increased. Further, you need to choose the option “merge Partitions” from the popup menu that appears on your screen.
  3. Thenchoose the partition that needs to be addedto the parent partitionand furtherselect the volume level, and then press ‘OK’ to continue.
  4. That’s it. You have successfully merged two partitions on your Windows 10 PC without any data loss.

Using DiskPart (Data Loss)

Below are the steps mentioned on how you can make use of DiskPart (a command-line tool), for merging two partitions on your Windows 10 PC:

  1. On the Windows Search Bar, you need to type“diskpart.exe” hit the Enter button.
  2. Further, type the text “list volume” on the command line window that appears on your screen. Press Enter to continue.
  3. Then, type“select volume <label>”and press Enter.
  4. Further, type“delete volume”so as to make that specific volume all-set for a merger.
  5. Then,choose the partition that needs to be extended. For that, you need to type“select volume <label>”so as to shift the focus to thatspecific volume.
  6. Finally, you need to extend this partition by typing“extend.”Themessage stating “DiskPart successfully extended the volume” will appear on your system in an instance.That’s it. You have successfully merged your D: drive and E: drive into one.

So, these were the methods using which you can easily merge Hard Disk partitions onyour Windows 10 PC. We hope that now you have a good understanding of how to combine or merge partitions using third-party tools like AOMEI Partition Assistant, the DiskPart, and the built-in Disk Management tool. Do express your honest opinion about this topic and if you are facing any issue, state it in the comment section below:

Wilder Zayn  is a self-professed security expert; he has been making the people aware of the security threats. His passion is to write about Cyber security,cryptography, malware, social engineering, internet and new media. He writes norton.com/setup security products.

Source: How to Merge Disk Partitions in Windows 10

How to Manage Notification Grouping on Apple Watch

 In this article, we have discussed about the ways using which you can manage Notification Grouping on Apple Watch. To prevent n number of alerts from cluttering the lock screen or complete Notification Center, Notification Grouping comes into play. If all the alerts are present in well-organized stacks according to your apps and or nature, it will be easy to navigate through and get access to any of the specific notifications needed in a bit more convenient way. Furthermore, you can also manage Notification Grouping with watchOS 7 on your Apple Watch. Doing this will help you use your preferred way of stacking the on-screen alerts. If you want the alerts to re-appear in their traditional form, you can disable the way you have stacked them.

Manage Notification Grouping on watchOS

Before we proceed on to how to manage Notification Grouping, let’s discuss the difference between By App and Automatic notification grouping so that, depending upon your requirements, you can opt for the one that’s right for you.

So, what’s the difference between By App and Automation Notification Grouping? To find the answer to this, we have listed several points you can go through. Similar to iOS 14, notifications are grouped by watchOS in two ways: By App and Automatically. In the “By App” mode, all the notifications are grouped in a single stack per app. However, in the “Automatic” mode, the notifications get stacked based upon the following nature: time, contacts, thread, discussion, and more. Hence, it totally depends on the user, which notification grouping mode he prefers to use.

Some users would like to group notifications in a single stack per app for apps related to finance, personal, activity, and expense tracking. This model provides users, convenience to check alerts in a clutter-free manner, from an app, in a single stack. It also ensures that the users don’t have to go anywhere else to find the required alerts of an app.

The other users might prefer using the “Automatic” mode, and that too mainly for the apps like reminders and news. While using the automatic mode, watchOS uses a machine-learning mechanism in order to monitor how a user interacts with the alerts and stacks the notifications to obtain a tailored experience. Depending on your preferences, the user can select his desired notification grouping style for apps. With that said, let’s get started with the steps, how the user can manage Notification Grouping on watchOS:

Choose the Preferred Style of Notification Grouping on watchOS

Please be noted that watchOS allows users to manage notification grouping per-app basis. So, you have to dig into every app in order to fine-tune its setting.

  1. First, open the Watch app on your paired iOS device.
  2. Further, click on the tab “My Watch.” You will find it on the left side on the bottom of your device’s screen.
  3. Now, press the option “Notifications.”
  4. Then, navigate to the app that is in question (the one that supports notification grouping).
  5. Post navigating to the app, you need to click on the option Notification Grouping.
  6. Finally, you need to opt from the three options listed below:
  7. Off: You can select “Off” to disable Notification Grouping for this particular app.
  8. Automatically: This mode is selected by default. However, if it has been changed previously, you can select it to allow watchOS stack notifications for this specific app.
  9. By App: You need to select “By App” if you want all your notifications to be grouped in a single stack by watchOS.

So, these were the details regarding how to manage Notification Grouping on watchOS. Now that you are well aware of the options available, you may select your preferred one that meets your requirements. With that said, it would have been of great help to the users if watchOS would have offered users to select the system-wide notification grouping style. Thankfully, Apple has brought it in watchOS 8. However, watchOS 7 has also met almost all the expectations of the users. All hail to the features like battery health, sleep tracking, hand wash detection, and more. All these features make watchOS 7 a great platform for Apple Watches.

So, what’s your opinion about the latest watchOS version? What would you prefer to see in the experience in the watchOS 8? Do let us know in the comments section below:

Wilder Zayn  is a self-professed security expert; he has been making the people aware of the security threats. His passion is to write about Cyber security,cryptography, malware, social engineering, internet and new media. He writes norton.com/setup security products.

Source: How to Manage Notification Grouping on Apple Watch

How to Install Kodi on Amazon Fire TV Stick

 In this article, we have discussed the ways using which you can install Kodi on Amazon Fire TV Stick. Not just popular for addons using which the users accessmovies, live TV, and more, Kodi also lets individuals manage their media profiles. It can be accessed from varioushardware devices and platforms. Apart from getting accessed on popular platforms like iOS, Android, Windows, and macOS, individuals can also access Kodi on Amazon Fire TV Stick. This would be great as the users would be able to use Kodi on a bigger screen. If you have access to a Fire TV Stick, installing Kodi and enjoying endless content would be an easy task. With that said, let’s proceed further to install Kodi on your Amazon Fire TV Stick.

Install Kodi on Amazon Fire TV Stick

We have discussed below a tried and testedmethod you can use to install Kodi on Amazon Fire TV Stick without any trouble. Basically, we are going to sideload Kodi’s Android APK on a Fire TV Stick. So, let’s proceed further to the steps for the same:

Transfer the Kodi APK to Fire TV Stick

You need to follow the steps mentioned below to transfer Kodi APK to your Fire TV Stick:

  1. First, you need toget the Kodi APK on your Android device from Kodi’s official website. If you are not able to decide which option to go for, follow this thumb rule. A majority of Fire TV Sticks are based uponthe 32-bit architecture, even those which have been launched recently. So you can choose 32-bit as a priority. You can go with the 64-bit architecture in case the former doesn’t work.
  2. Now, head back to the Fire TV Stick and click on the “Alexa” button located on your remote and state the phrase “Send Files to TV .” Further, press the “Get” button in order to install the app.
  3. Then install the same “Send Files to TV” app on your Android device. You can get the app from Google Play Store.
  4. Once you have installed it, launch it and click on “Send.”Further, get the downloaded Kodi APK on your Android device.
  5. The Amazon Fire TV stick in your network will get detected by the SFTTV app. You simply need to tap on it, and your Kodi APK will be delivered to yourFire TV Stick in a while. Always ensure that your Android device and Fire TV Stick and are connected to the common Wi-Fi network.
  6. That’s it. Your file transfer is complete. Now, you can exit the app.

Installing Kodi APK on Fire TV Stick

  1. Once the Kodi APK transfer to your Fire TV Stick is successful, proceed further toinstall it.
  2. Further, long-press the “Alexa” button on your remote and state the command “Total Commander app.”You will be redirected to the installation page, where you need to click on “Get” to install it.
  3. Once the app is installed, you need to open Total Commander and head over to the APK. You may find it under the Download title. Tap on it to install the app.
  4. On the page ahead, you need to allow Total Commander to “Install Unknown Apps.”
  5. Now press the option “Install.” Allow some time for Kodi to get installed on your Fire TV Stick.
  6. Once the installation procedure finishes, click on “Open.”
  7. Further, enjoy Kodi on your Fire TV Stick without any restrictions.
  8. Individuals can access Kodi from the App Store and then clicking on All Your Apps. Please be noted that some apps might not show you the correct app icon.

How to Update Kodi on Fire TV Stick

The process to install Kodi might seem a bit lengthy; however, it is easy and straightforward. Similarly, updating Kodi on Fire TV Stick follows a similar process as mentioned above. Currently, due to the unavailability of the official channel for updating Kodi, you need to download the most recent APK every time and further install it on top of your existing Kodi setup. You don’t have to worry about your existing add-ons and repository, as they will remain unaffectedeven after you haveupdated Kodi. So, yes, you can follow the steps listed above, and they will help you update Kodi to the latest version on your Fire TV Stick.

With that said, let’s end this article on how to install and update Kodi on Amazon Fire TV Stick. Follow the steps mentioned above, and you will be able to run it without any issues.Please be noted that we haven’t used any third-party app store to get Kodi. So,there will be no chance of modifying the Kodi APK file source code, thereby making the installation process totally malware-free. That’s all from us for now. Do let us know in the comment section if you are facing any issues, and we will be delighted to serve you out.

Wilder Zayn  is a self-professed security expert; he has been making the people aware of the security threats. His passion is to write about Cyber security,cryptography, malware, social engineering, internet and new media. He writes mcafee.com/activate security products.

Source: How to Install Kodi on Amazon Fire TV Stick


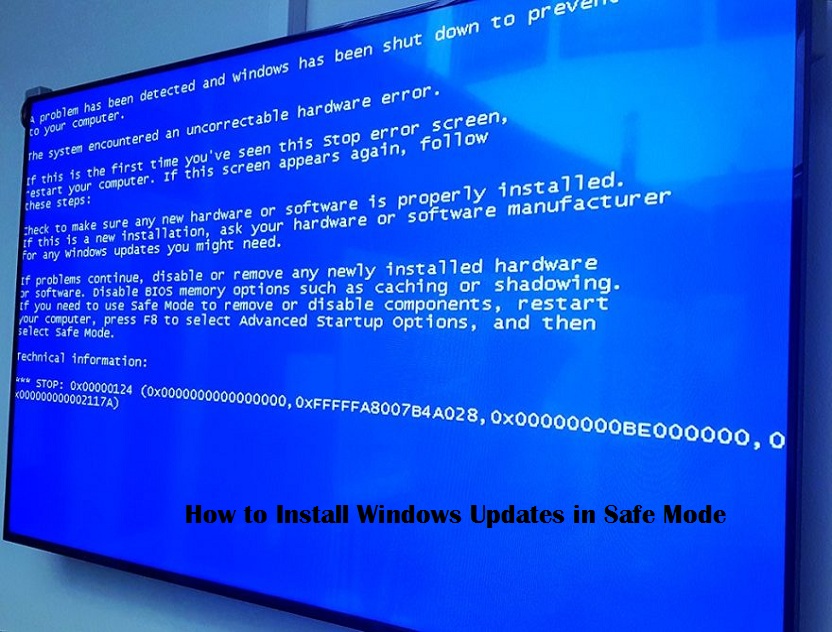
How to Install Windows Updates in Safe Mode

In this article, we have discussed the ways using which you can install Windows Update using the Safe Mode.

Safe Mode is also termed as the diagnostic mode of Windows. It runs only when the system is equipped with essential programs. You can use Safe Mode for updating your Windows 10 PC, if and only if your PC is not restarting normally. Installing updates in Safe Mode when your PC is getting restarted normally will lead to the installation of only a limited number of components. If you have succeeded in starting your PC normally, it is recommended to reinstall the service packs and updates.

Safe Mode is intended to be used when the user is facing an issue with his system. Being the diagnostic mode of Windows, Safe Mode allows essential system programs and services to start up at the boot time of the PC.

Windows usually scans what system and device components are enabled so as to recommend what kind of updates need to be installed. So, it would not be optimal to update Windows 10 using the Safe Mode unless you are facing issues with the normal boot-up of your Windows 10 PC.

Only a fraction of updates will get installed on your Windows 10 PC, as several components and devices are not active in Safe Mode. This will eventually lead to intermittent file or registry errors when the PC boots up normally. The features and services running in the background will not get activated by default due to this reason.

The only acceptable situation to install Windows updates in Safe Mode is that your PC is not starting normally. And even if you have installed the updates in Safe Mode, it is recommended that you reinstall them as soon as your Windows 10 PC starts normally.

Installing Windows Updates in Safe Mode

To install the Windows Update in Safe Mode, you need to follow the steps mentioned below:

  1. Tap on the Windows button.
  2. Further, press the Power button.
  3. Long press the Shift key and tap on Restart.
  4. Head over to the Troubleshoot options.
  5. Further, go to the Advanced Settings.
  6. Select Start-up Settings.
  7. Now press Restart.
  8. Then, tap 5 on your keyboard and select Safe Mode with Networking and tap on Enter.
  9. Now, open the Start Menu and enter the title Windows Update in the search bar.
  10. Now tap the Windows Update icon and head over to the left side screen.
  11. Further, tap on Change Settings and select Install Updates Automatically.
  12. Now, you need to check for the latest updates by clicking on the option “Check for Updates.”
  13. Further, tap on the option View Available Updates, and all the latest updates will appear on your screen accordingly.
  14. You need to opt for the required updates and further press Install.
  15. Once the installation is finished, tap on Reboot so that your PC can restart with the updated settings.
  16. Now, you need to click on the “Reinstall the updates” option to boot your system in the normal mode.

So, these were the steps using which you can get access to the latest Windows updates, even when you boot your system using theSafe Mode. This procedure is not intended for normal use; however, there might arise some exceptions where you would have to make use of this method.

Wilder Zayn  is a self-professed security expert; he has been making the people aware of the security threats. His passion is to write about Cyber security,cryptography, malware, social engineering, internet and new media. He writes norton.com/setup security products.

Source: How to Install Windows Updates in Safe Mode

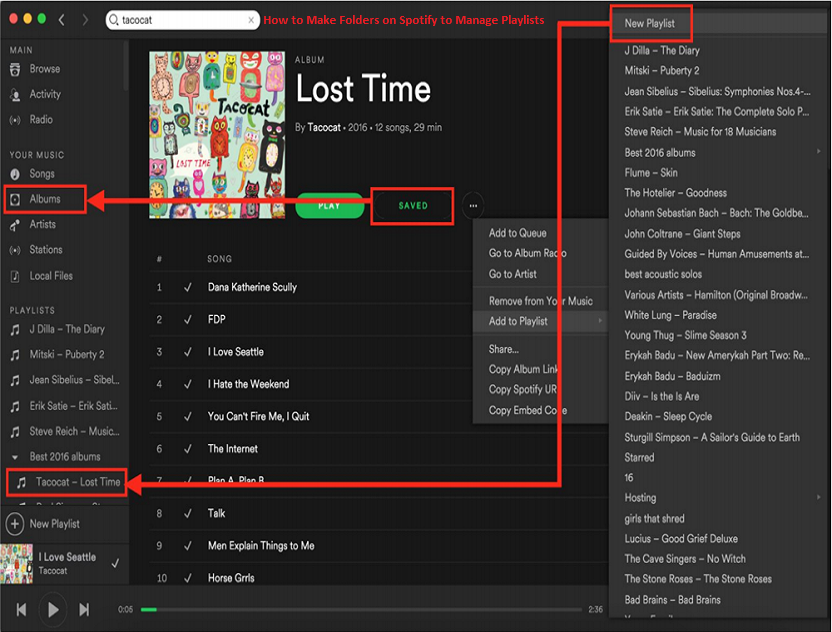
How to Make Folders on Spotify to Manage Playlists

 In this article, we have discussed the ways using which you can create folders on Spotify to manage your playlists. Being one of the best music services on the market at present, Spotify not only offers an enormous collection of tracks but also has a vast collection of useful features that lets the app dominate over other music streaming services and make it more useful. One of the most prominent examples to support this fact is its ‘folders’ feature that the streaming service offers its users. With the help of this feature, individuals can manage their playlists very efficiently. The concept behind this is to group together similar playlists so that the users can easily access them whenever required. Never heard of Spotify folders? Here’s all about them and how you can create and manage them by yourself.

Make Folders on Spotify

To create Spotify folders, you need to have access to the desktop or web app of Spotify. This means the Spotify folders cannot be created using Spotify’smobile app. With that set, let’s proceed to the steps you need to know about how to make folders on Spotify. So,go through the instructions listed in the article toget detailed information abouthow to create Spotify folders.

Create and Manage Spotify Folders

You need to create and manage Spotify folders using the steps mentioned below:

  1. Launch the Spotify Web/Desktop app, and then right-click on a specific playlist from the list of playlists appearing on the left sidebar. Further, select the option “Create Folder” from the list of options appearing now.
  2. Once you tap on that option, a new folder will be created. Further, youcan assign a name to the folder that’s relevant to the playlists that need to be added to access quickly.
  3. After creating the folder, you need to add playlists to it. For that, you need to drag and drop your existing playlists into your folder. A visual feedback will appear when you drag and drop your playlist into your folder.
  4. After adding playlists to the folder, accessing them is easy asyou just have to click on the folder name. Further,you can make use of the arrow key appearing next to the name of the folder in order to shrink or expand the playlist folder accordingly from the view, as desired. Individuals can even create a folder inside a folder, and this can be achieved by simply right-clicking the on the folder and clicking the option“Create Folder.”
  5. Moving ahead,in case you change your mind and want to drag the playlists outside the folderand further delete it, you can do so very easily without any restrictions. But, do remember that deleting the folder will delete all the playlists present in the folder, forever and you won’t be able to recover them later on. So, make sure to move all your playlists outside the folder before you delete the Spotify folder.

Spotify Folders on Mobile App

Generally, Spotify’s mobile app doesn’t let users create new folders likethey create on the web and desktop. However, the mobile app lets users create new playlists in a folder that has been created by them using the web or desktop app of Spotify. With that said, you cannot add your existing playlists to a folder using the Spotify mobile app. Also, through the Spotify mobile app, individuals cannot move a playlist out of a folder that has been created using the desktop or mobile app. Also, you cannot delete a Spotify folder from your handset. Spotify doesn’t officially support the feature on handsets, so this is the reason why there are a vast number of limitations.

So, these were the details regarding how users can make use ofthe“Folders” feature of Spotify for managing and grouping the playlists. Using the steps mentioned above, users can organize their playlists on desktop and web versions of Spotify. That’s all from us as of now. Please do let us know in the comment section about your views on this feature, and do share in case you are facing any issues.

Wilder Zayn  is a self-professed security expert; he has been making the people aware of the security threats. His passion is to write about Cyber security,cryptography, malware, social engineering, internet and new media. He writes office.com/setup security products.

Source: How to Make Folders on Spotify to Manage Playlists

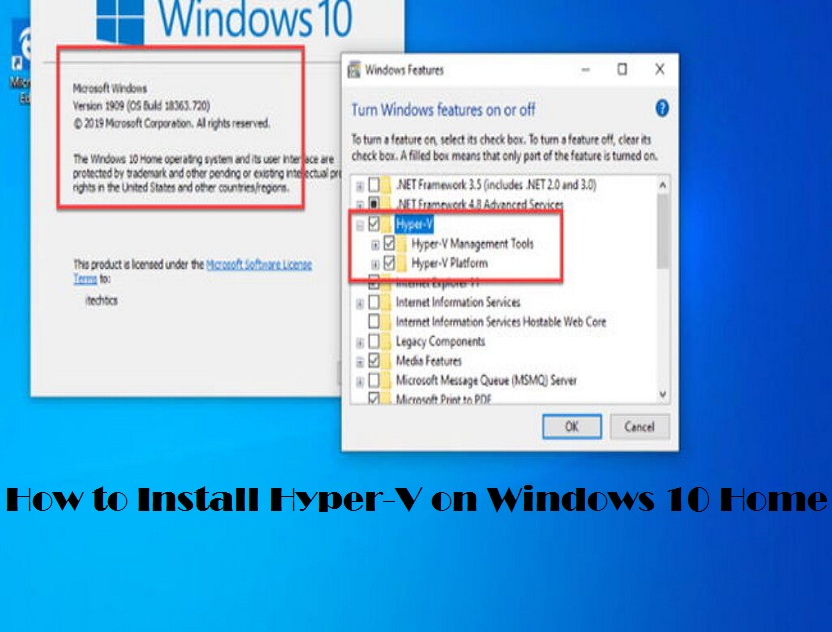
How to Install Hyper-V on Windows 10 Home

In this article, we have discussed the ways using which you can install Hyper-V on Windows 10 Home. Windows 10 has been working on its own Virtual Machine in order to bring a built-in VM capability on Windows. Similar to several otherVMapps, Hyper-V allows users to run a vast number of operating systems on top of Windows 10. While it’s magnificent to use such a VM capability, the only issue with Hyper-V is that it is not available on Windows 10 Home. So, we have come up with a workaround that will let you install Hyper-V on your Windows 10 Home PC. Follow the steps mentioned below for the same:

Install Hyper-V on Windows 10 Home

To install Hyper-V on Windows 10 Home, you need to follow the steps mentioned below:

  1. First, download the batch file in order to turn on Hyper-V for your Windows 10 Home. TheWindows 10batch file is developed bythe developers at Microsoft Virtualization.

  2. Further, choose “Run as Administrator” by right-clicking on the batch file.

  3. The Power Shell/Command Prompt window will open, and the installation of Hyper-V will begin on Windows 10 Home. Please make sure you are connected to the internet in order to enable this feature.

  4. After installing Hyper-V, you need to restart your PC. Further, press together “Windows” and “R” keys simultaneously in order to open the Run window.

  5. Now, type optionalfeatures.exe and press enter.

  6. The Windows Features screen will get displayed on your screen. Now, you need to scroll below to enable all the Hyper-V checkboxes and press OK to continue. This will initiate the installation of the necessary packages, and further, it will ask you to restart your PC after the installation is completed.

  7. Hyper-V will get activated on your Windows 10 Home once the installation finishes up. Now you can simplypressthe Windows key and search for “Hyper-V.” Doing this will show you the results from which you need to go to Hyper-V and open it.
  8. In case Hyper-V doesn’t appear in the search result, you need to open the Run window andtype virtmgmt.msc, and press enter. Doing this will open Hyper-V Manager on your Windows 10 Home PC.

So, these were the steps using which you can enable Hyper-V on your Windows 10 and create virtual machines. That’s all from us for now. Please let us know in the comment sectionif you face facing any issues.

Wilder Zayn  is a self-professed security expert; he has been making the people aware of the security threats. His passion is to write about Cyber security,cryptography, malware, social engineering, internet and new media. He writes office.com/setup security products.

Source: How to Install Hyper-V on Windows 10 Home


How to Make the Right Use of Your Old Xbox One and PS4

 Have you just upgraded your old PS4 or Xbox One console with a new PS5 or Xbox Series X or Series S console? If yes, then what are you going to do with your old PS4 or Xbox One console? It’s true that you will barely spend time with your old console. So what have you thought about it?

If you have not decided anything yet about what to do with your old console, this guide will help you. We will discuss everything you can do with your PS4 or Xbox One console if you are not going to use them for gaming. Let’s get started.

Making Perfect Use of an Old PS4 or Xbox One

Since you will now use your latest console for gaming, your old gaming console is still very useful. All you have to do is keep reading this article, and we will show how you can use it wisely.

This article is especially for those who are not selling their old consoles. Here are some really ideal ways to use your old gaming machine:

1. Use it as a Media Player

Since PS4 and Xbox One have potent processors and plenty of RAM, it makes them perfect as a high-definition media player for your television. All you have to do is connect your console to your living room TV and install some entertainment applications on your old console to enjoy on-demand video streaming. There are plenty of on-demand video streaming apps available on both PS4 and Xbox One consoles, be it Disney+, Netflix, Hulu, Plex, Crackle, Crunchyroll, and many more. You can simply cut the cord and switch to any of the on-demand or live TV applications.

If you are already using a media streaming device on your living room television, then you can purchase a used monitor from eBay at a low price to connect with your PS4 or Xbox One. This way, you will be able to create a new entertainment system for your house other than your living room.

Recently Apple TV+, one of the most popular and hot streaming applications, is also arrived on the Xbox One and PS4 consoles. The best thing that we love about these devices is that they can easily play high-resolution videos with 60FPS. You can easily stream 4k videos on your PS4 and Xbox One due to their high-end hardware.

If you don’t wish to invest money in paid streaming apps, like Netflix, Disney Plus, and all, you can simply enjoy YouTube and other free streaming apps, like Plex, crackle, and more. There are many other free entertainment applications and websites available that you can use on your old console.

 All these applications are available on the default app store of your gaming device. On Xbox One, the Microsoft Store has all the apps you need to convert it into a media center. Similarly, PS4 has a default app store where you can download all required apps.

Furthermore, both these consoles are capable of playing Blu-Ray DVDs and discs as they have a DVD drive. So you can play movies anytime by ordering one of your favorite movies from Amazon. During the lockdown, many production companies are selling their movies through DVDs on Amazon as soon as the movie launches.

 2. Give it to Your Friend

 If you do not want to sell it, you can gift it to someone who loves playing games. If you know somebody who cannot afford a console, you can give it to them as a gift. They will never forget your kindness and love. Giving others can provide you untold happiness. Even if you don’t want to gift it, then you can talk to those who need a console and give it to them at a low price.

3. Sell it

If you want great value for your product and need money, it would be best to sell it on a reliable platform, like eBay and others. When you publish an advertisement for your console, make sure to accurately provide every detail about your product to get its best value.

Conclusion

That is what you can do with the old gaming console that is no longer useful to you as a gaming console. If you have liked this article, then it would be a pleasure for us. Thank you.

Wilder Zayn  is a self-professed security expert; he has been making the people aware of the security threats. His passion is to write about Cyber security,cryptography, malware, social engineering, internet and new media. He writes office.com/setup security products.

Source: How to Make the Right Use of Your Old Xbox One and PS4

How to Fix ‘Computer Account Creation Failed’ Error in M1 Mac

 In this article, we have discussed the ways using which you can Fix the “Computer Account Creation Failed” error on your M1 Mac. Recently, Apple launched MacBook Air, Mac Mini, MacBook Pro with its M1 chip that has received widespread praise for its performance. This is because the new chip offers incredible per watt performance and the laptops loaded with this chip are ranking better in the benchmark tests compared to the Intel Macs.

However, there a vast number of M1 chip-loaded Mac users who are continuously reporting issues that they are facing on their device, including the error that pops up when the user is setting up his M1 Mac. So, if you are among the individuals who are facing the ‘Computer Account Creation Failed’ error, you need not panic; rather, go through the steps mentioned below to find out a suitable solution for yourself.

Fixing the ‘Computer Account Creation Failed’ Error in Apple M1 Mac

Before you head over to the steps to fix the issue, you should be aware of this error in general. In the previous few weeks, a vast number of users have already reported about this issue, and a lot of other users are still reporting about it. In a maximum number of cases, this user account creation process fails to work, thereby holding your Mac in a stuck-up situation. The error remains on the screen for a long duration than expected.

In several cases, this error gets displayed whenthe M1 Mac is reformatted or reset. What is more frustrating is that when the M1 Mac is restarted after this error, it shows the same user accountthat was failed while creating, and further, if you enter the password you created, it won’t work. This would no doubt irritate and at the same time annoy the users.

So, we have come up with certain ways you can fix this issue on your M1 Mac. If you are facing a similar issue as discussed above, you can go through the steps that have been mentioned below:

What’s the Solution?

So, the “Computer Account Creation Failed”error definitely has asolution, and you just need to follow along with a few steps that we have mentioned below. Before you proceed with the steps to resolve the issue, please be noted that you can resolve the issue only with the help of another working Mac. No doubt, you will have to take the help of your friend or colleague who carries a Mac. In case you are not able to get access to another Mac, you may contact Apple support for help. No doubt, they will come for your help.

Below mentioned are the steps you need to follow in order to resolve the issue with your M1 Mac.

  • Set Apple Configurator on the second Mac and further connectboth the Macs.
  • Put your MacBook Air, Mac Mini, or MacBook Proin DFU Mode.
  • Restore and further reinstall therecoveryOS and macOS on your M1 Mac.

Let us discuss the steps in detail for better understanding:

Setting up Apple Configurator and Connecting Both Macs

You need to follow the below-mentioned steps to set up the Apple Configurator and connect both the Macs:

  • First, download the Apple Configurator 2 app on the second Mac. You can download the mentioned app for free from the App Store. Once you have downloaded it, you need to launch it.
  • Further, you need to shut downyour M1 Mac.
  • Now, using a USB-C cable, you need to connect the second Mac to your initial M1 Mac.
  • It is recommended to connect the USB Type-C to the port on the extreme left on the backside of your Mac if you are trying to fix your M1 Mac Mini. Otherwise, if you are trying to resolve the issue with your M1 MacBook Pro or M1 MacBook Air, connect the USB Type-C on the extreme left USB-C port appearing on the left side of your MacBook.

Put Your MacBook Air, Mac Mini, or MacBook Pro in DFU Mode

You need to follow these steps to put your Mac Mini in DFU Mode:

  • First, establish a connection between your Mac Mini and your monitor and further disconnect your Mac Mini from power for 10 seconds.
  • Long press the power button. You need to do this without connecting the power cable of your Mac Minito the outlet.
  • While you are still holding the power button, you need to connect your Mac Mini to the power outlet and further release the power button. You can see the amber-colored status light on your Mac Mini.

To put your MacBook Pro or MacBook Air in the DFU Mode, you can follow the steps mentioned below:

  • First, tap onyour MacBook’s power button.
  • While the power button is in a holding state, you need to simultaneously press the following keys for 10 seconds: right Shift key, left Option key, and the left Control key.
  • Release the key after 10 seconds, but make sure you are still holding the power button until the Apple Configurator screen appears on the second Mac.

Restore and Reinstall recoveryOS and macOS

Restoring and reinstalling is easy yet a bit time-consuming.You need to follow the steps mentioned below:

  • Right-click in the Apple Configurator, further press the option “Restore.”
  • Now, tap on“Restore” again in the pop-up regarding confirmation.
  • The Apple Configurator downloading screen will appear on your display, and further, you can see the installation process progressing on your M1 Mac. It’s completely normal to see the Apple logo while the process is progressing. It might appear or disappear randomly throughout the process.
  • Once the process finishes up, your M1 mac will now show you the macOS Setup Assistant.

Now, whenever you initiate the set up on the M1 Mac, its user account screen will work normally and let you easily create your user account.

So, these were the steps you can follow to fix account creation issues on M1 Mac. Till Apple resolves this issue, you need to make use of the above-mentioned workaround to fix the issue.

Wilder Zayn  is a self-professed security expert; he has been making the people aware of the security threats. His passion is to write about Cyber security,cryptography, malware, social engineering, internet and new media. He writes mcafee.com/activate security products.

Source: How to Fix ‘Computer Account Creation Failed’ Error in M1 Mac

How to Use Time to Walk Feature in Apple Fitness Plus?

Apple use to add several new services and apps to its health and fitness device that is Apple Watch. The company has recently introduced an ...