Wednesday 31 March 2021

The Best Gaming Emulators

 Emulators are excellent for playing various classic games on a smartphone; these tools help you carry a wide range of games in your pocket. In this article, we will introduce you to the best Game Boy emulators that you can use on your Android device. So without wasting much more time, let’s get started!

ClassicBoy Gold

ClassicBoy is a fantastic all-in-one emulator with the support for a bunch of consoles, including Sega Genesis, PlayStation, NES, Game Boy, Game Boy Color, as well as Game Boy Advance. It works very well. This emulator supports a wide range of games. Besides that, it provides you with load and-save states, an option for fast forward, cheat-code support, and hardware controller support. ClassicBoy Gold runs very smoothly, you can use it for free, but there is a premium version of the app that’s subscription charges will cost you up to $5.99.

EmuBox

EmuBox is comparatively a new all-in-one console emulator that works quite similar toClassicBoy. It supports a variety of consoles, including PlayStation, Nintendo DS, Game Boy Color, SNES, and Game Boy Advance. It includes some usual features as well, such as load and-save states, support for cheat codes, the ability to fast forward, and support for hardware controllers. It is a new emulator, but it works fantastically. This emulator is available entirely for free to use with no in-app purchases, but it includes some ads.

GBA.emu

GBA.emu is another pretty decent Game Boy emulator with Game Boy Advance support. It provides you with a variety of features, including BIOS emulation, quick saves, support for hardware controllers, cheat codes, cross-platform support, and more. It runs quite smoothly and is compatible with most game ROMs. The emulator runs for $4.99, but it also has a refund period; you can get your money back within this period if you don’t like its performance.

GBC.emu

GBC.emu is another great Game Boy and Game Boy Color emulator that is compatible with a variety of games. The emulator provides you with a variety of features, such as support for Gameshark and Genie cheat codes, hardware controller support, cross-platform support, and more. This one is available for $2.99 with a refund period, in which you can get your money back in case you don’t want to take its services.

John GBAC

John GBAC is an excellent emulator with John GBA and Jhon GBC functionality. It has virtual and hardware controller support along with turbo buttons. Additionally, it features SD card support, cheat codes, Dropbox, the ability to slow down to up to 0.25X and make fast forward to up to 16 times. It works with most ROMs and is available for free, but it also offers a premium version. You can buy a subscription to its paid version if you want; it will cost you $4.49.

My Boy

My Boy is a very popular Game Boy Advance emulator that offers high compatibility along with a bunch of advanced features. It includes fast forward and slow-down modes, hardware controller support, cheat codes, superior link support, and WiFi or Bluetooth connectivity options. It even offers BIOS emulation, OpenGL rendering, and rumble emulation. The emulator works fantastically and is available for $4.99; it even has a free version that you can also use if you don’t want to spend your money.

These are all our picks for the best Game Boy emulators; we would strongly recommend you try a few of the above-mentioned emulators on your Android device. I hope you liked the article. Thank you for reading it.

Meta: Here are some of the best Game Boy emulators that you can use on your Android. These Game Boy emulators run fantastically and are available at affordable prices.

Wilder Zayn  is a self-professed security expert; he has been making the people aware of the security threats. His passion is to write about Cyber security,cryptography, malware, social engineering, internet and new media. He writes office.com/setup security products.

Source: https://mynew-office.com/the-best-gaming-emulators/

Tuesday 30 March 2021

How to Import and Export Bookmarks in Google Chrome?

 In this article, we have discussed the ways using which you can import/export bookmarks in Chrome. So, what’s the first thing you would do if you find out something that’s eye-catching to you. Well, you would probably try to save it. So, using the“bookmark” option, it would be prettyeasy for you to save important pages. However, there also arise some unfortunate moments where people lose their bookmarks. So, this article discusses the ways using which you can actually import or export the bookmarks as desired.

If you bookmark a webpage, it simply means you are saving the extension of that specific webpage for future references, and doing this can help you reach thatparticular page in no time. You can access that page with just a click whenever it is required. No doubt, this willalso save a lot of your precious time.

How to Create a Bookmark in Google Chrome?

You can create a bookmark by following a couple of steps. They are as follows:

  1. First, you need to visit the webpage in question. Further tap on the star icon appearing on the right upper-right corner of the search barto bookmark that specific webpage.
  2. The other way of bookmarking the webpage is by clicking on the three dotsappearing on the top-right corner and then searching for the option “Bookmarks.” Just click on it, and further tap on the first option stating “Bookmark this tab..” and you are done.
  3. You can also use the shortcut ctrl + d to bring the bookmarks prompt window on your screen. Further click on “Done” to bookmark that particular page. Meanwhile, you can also create folders to save your bookmarks under different categories.

Import and Export Bookmarks in Chrome

You can import and export bookmarks in Chrome using the steps listed below:

To Import Bookmark:

To import the bookmarks, follow the below-mentioned steps:

  1. Tap on the three-dots menu appearing on the upper-right corner. Further, scroll down and tap on the option “Bookmark.”
  2. You will see a “Bookmark Manager” option, on which you need to tap.
  3. A list of options will appear on your screen, among which you need to select the fifth option stating “Import bookmarks and settings.”
  4. Now click on “Import” in the prompt window appearing on the next page on your PC’s screen.
  5. The same can also be done by tapping on the “Bookmark manager” option appearing under “Bookmarks.” Further click on the horizontal dots appearing under Bookmark manager, and tap on “Import Bookmarks.”
  6. You may then save the file at your desired location on your PC.

To Export Bookmark:

To export a Bookmark, you need to follow along the steps mentioned below:

  1. Click the three dots appearing on the upper-right corner. Now scroll below to the option “Bookmark” and tap on it.
  2. Under the “Bookmark Manager” option, tap on three-dots on the upper-right corner.
  3. Now, press the option “Export of bookmark,” and save the file on the desired location on your PC.

So, these were the steps using which you can import/export bookmarks in Chrome. Do let us know your opinion on this article in the comment section below:

Wilder Zayn  is a self-professed security expert; he has been making the people aware of the security threats. His passion is to write about Cyber security,cryptography, malware, social engineering, internet and new media. He writes office.com/setup security products.

Source: https://go-officecom.com/how-to-import-and-export-bookmarks-in-google-chrome/

Wednesday 24 March 2021

How to View What Apps Are Using Camera and Microphone on Android

 Microphones and cameras are some of the most critical sensors of your smartphone. Since your phone stays connected to the internet all the time, someone can remotely access your phone’s camera and microphone. This can cause a lot of privacy issues and concerns. So, in this article, we are going to show you how to check which apps are using the camera and microphone on your Android phone. We will also show how you can allow and disallow apps to use your phone’s camera and microphone.

This way, you will be able to protect your privacy from third-party advertisers and other spiteful people. Using your phone’s camera and microphone, someone can easily keep an eye on you remotely, and it can be one of the worst things you could experience. Gladly, Android provides users with a full-fledged authority over what apps can use your phone’s camera and microphone and what can’t.

You can easily turn off camera and microphone accesses for specific applications on your device. The best thing is that you don’t need to install any third-party application to make this happen. You can use the built-in Settings app on your Android phone to allow and disallow camera and microphone usage for apps.

Let’s get started.

View What Apps Use Camera and Microphone of Your Android Phone

You can do this very easily, and it won’t even take time to view which apps use mobile’s camera and microphone. Let’s learn it together.

Here is what you need to do to make this happen:

  1. First and foremost, navigate to the settings application of your Android device. To do this, simply open the notification panel or quick settings pane of your Android phone.
  2. Then find and select the small gear like button.
  3. When you reach inside the settings application, look for the Privacy options.
  4. Select it, and then find and open the ‘Permission manager’ or similar option. 
  5. Now you will see all permissions of your Android device, like camera, contacts, SMS, and so on.
  6. You are here looking for the camera and microphone options.
  7. So, first of all, open the Camera option.
  8. Now you can see what apps are using your phone’s camera.
  9. You may also see app permissions categorized by ‘Ask every time,’ ‘disabled,’ ‘allowed all the times,’ and ‘only while in use.’
  10. If you cannot find the Privacy section inside your phone settings, simply look for the ‘App Permissions’ option in the settings. You will find it under the Apps and Notifications option.
  11. Now simply allow and disallow apps to use your phone camera by tapping on them.
  12. We advise you to don’t allow third-party applications to your phone camera if it’s not necessary.
  13. Now go back and also open the microphone permissions.
  14. Check which apps are using your phone’s microphone.
  15. If you see an app that does not require the microphone but still uses it, retrieve the permission quickly.

You should disallow camera and microphone permissions for all applications that don’t need a microphone and camera to function. This way, you will be able to secure your privacy and stay safe.

How to Allow an App to Use Your Phone’s Camera or Microphone

If you wish to allow an application to use your phone’s camera on microphone, then simply follow these steps:

  1. First and foremost, remember that if an app requires a microphone or camera to function, it will ask when you use it. However, you may sometimes need to manually allow or disallow app permissions.
  2. To manually allow an application to use your phone camera and microphone, go to the Settings and find the option that says Apps and Notifications or Privacy.
  3. Now look for the App Permissions option.
  4. Find the camera app permission.
  5. Find the application for which you wish to use your phone camera or microphone.
  6. Click on the app to allow or disallow the app permission.
  7. Congratulations, you have successfully enabled permission for a certain app.

We expect you have found this article informative and helpful. Now you will be able to secure your privacy by limiting camera and microphone app permissions.

Wilder Zayn  is a self-professed security expert; he has been making the people aware of the security threats. His passion is to write about Cyber security,cryptography, malware, social engineering, internet and new media. He writes norton.com/setup security products.

Source: https://alphacopyalpha.wordpress.com/2021/03/24/how-to-view-what-apps-are-using-camera-and-microphone-on-android/


Thursday 18 March 2021

Gaming Headsets You Can Buy

If you are looking for a gaming headset, you have plenty of options. But they’re chances to pay accidentally too much for a headset that you might don’t like. So knowing a little bit about the device that you are going to buy can be very helpful to you in making a great purchase. You will find multiple categories below for gaming headsets that are compatible with PS4, PS5, PC, Xbox, and even Nintendo Switch.

HyperX Cloud II Wireless ($150)

HyperX Cloud II is one of the best wireless gaming headsets you can get now. The headset features a USB-C port for charging, a powerful battery that can last up to 30 hours on a single charge, great stability to up to 25 feet away, and a comfortable design. The headset can be expanded to fit different heads. It works very decently and you will excellent sound experience with this headset while playing a game on PC, Nintendo Switch, and PlayStation. It is available for $150.

Astro A20 Gen 2

Astro A20 Gen 2 is available for $120, but you will have to purchase an extra $20 adapter to use it with PlayStation and Xbox. However, the headset features more buttons and features compared to the above-mentioned headset. It even includes a dedicated button for switching the equalizer and add or subtract bass or vocal clarity as you want. You also get a game and chat audio mixing dial that you can use to make the right balance of sounds. Well, the headset includes a mic monitoring feature as well, so you can hear the outside world too. You can’t detach the microphone of the headset, but you can move it up in order to mute it. The sound quality of the headset is nice and it can give you a stable connection to up to 15 meters of range.

RazerKaira Pro

RazerKaira Pro is the best gaming headset for Xbox consoles and PC. The headset includes a Bluetooth connectivity option so that you can enjoy listening to music, podcasts, and even calls wirelessly. Additionally, it features a handy game and chats dial, a USB-C port, built-in microphones, and a detachable boom mic. It produces great sound and is available for $150.

Corsair HS75 Wireless

Corsair HS75 Wireless gaming headset provides you with impressive sound quality, great compatibility with Xbox and PC, a comfortable design, and a game and chats audio dial. It even has a volume dial and a straightforward way to mute the microphone. It can last up to 20 hours on a single charge. The headset features a USB-C port for charging. You can get it for $150.

Sony Pulse 3D

If you are looking for an affordable wireless headset, then Sony Pulse 3D is going to be an excellent choice for you. The headset is available for $99. It features a 3.5mm audio jack, USB-C port for charging, 13 hours of battery life, and great sound quality. It also includes a dedicated switch that will help you turn on mic monitoring. It overall works fantastically, and you shall consider it buying.

These are all our picks for the gaming headsets; you can buy any of them. That’s all for this article. Thank you for reading it.

Wilder Zayn  is a self-professed security expert; he has been making the people aware of the security threats. His passion is to write about Cyber security,cryptography, malware, social engineering, internet and new media. He writes mcafee.com/activate security products.

Source: https://sortmcafee.com/gaming-headsets-you-can-buy/

Hidden Features on Windows 10 that You Should Try

Windows is one of the most popular operating systems and millions of people use it every day for a variety of purposes. But there are some hidden features on Windows 10 about which you might not aware of. In this article, we will share some tips to access these hidden features.

God Mode

God Mode, also known as Shortcut Windows Master Control Panel. Once you enable this feature, it will provide you with advanced customization tools with more than 200 advanced settings. This is a very powerful feature and it can cause a lot of unforeseen harm to your device due to this reason Microsoft hid this tool. However, if you want to access this tool, then you will have to follow a few steps mentioned below:

Create an empty folder on the desktop to use it as a shortcut to access the God Mode, Now rename the folder in the following format – (Folder Name). {ED7BA470-8E54-465E-825C-99712043E01C}. Once you are done with the renaming process, the folder will automatically change into a shortcut format. Now double click on it and you are ready to use the God Mode.

Swipe Down to Shut Down

You can use this feature to turn off your computer quickly. To enable this feature, you will have to create a shortcut folder on the desktop. Click right and choose the Shortcut option. Now you will be redirected to a new window where you can browse and activate the SlideToShutDown option.

Game in Cortana

As we all know that Windows has a voice assistant named Cortona that is not very advance but it works decently. But do you know that it includes some mini-games? Well, these games are not super exciting, but they are good to spend a few minutes. You just need to open Cortona and type or speak Rock Paper Scissors, Flip the Coin, or Roll the Die, and it will redirect to the game window.

Shake to Clean Screen

This feature will help you clean your screen without turning off each window. You just need to hold the top bar space on Windows 10 and shake back and forth multiple times and it will automatically close all your windows automatically beside the window you want to keep using.

3D Apps

Microsoft added a hidden app that has the ability to manipulate 3 models, you can use this tool to have some fun and kill your spare time. To use it, you just need to open the search bar, type Mixed Reality Viewer in it, and press enter.

These are undoubtedly very cool features and I strongly recommend you try them. These tools will give you entirely a new experience of using Windows 10. Well, you might have already heard about or used a few of the features mentioned above, but if you haven’t tried any of them, then it’s the time you should do it. Thank you!

Wilder Zayn  is a self-professed security expert; he has been making the people aware of the security threats. His passion is to write about Cyber security,cryptography, malware, social engineering, internet and new media. He writes norton.com/setup security products.

Source: https://smnorton.com/hidden-features-on-windows-10-that-you-should-try/

Enhance Your Instagram Feed with These Fantastic VSCO Filters

VSCO is an app that allows you to take photos directly from the app as well as import images from your phone’s gallery and apply various filters to them. Well, most of the filters on this app are available for free to use, but there are some filters that need a subscription to get accessed. In this article, we will share some excellent VSCO filters that will completely transform your photos and help you enhance your Instagram feed. Let’s take a look.

M3

M3 is a pretty decent natural-feeling filter that you can use to tweak the colors in your photos in order to give it a soft brown tone. You can use this filter to enhance the natural shots.

P5

P5 is a very popular VSCO filter that basically gives your images a bit emphasized cooler, edgy, and atmospheric look. You can use this filter to add a little grit and grunge to your photos. Besides that, you can add grain and scratches to your images using this filter.

C1

C1 is another great VSCO filter that you can apply to your images to give them a bit colorful and vibrant look. It looks great when you apply this filter to images containing flowers, beaches, or nature scenes.

F2

F2 filter is great for enhancing the tone of an image. You can use this filter on images containing everyday moments.

M5

M5 is a great filter to give your images a vintage look. This filter can make your images look a bit mellow and desaturated. You can use this filer on portrait shots, it will give you a retro feel.

G3

G3 is another great filter for portraits. It can enhance your skin tone, and sharpen the vibrancy and colors of the images containing still-life scenes. Well, this filter doesn’t work for most images, but when it works, it gives your image entirely a different look.

B1

Well, this list would be incomplete without the B1 VSCO filter. It’s a black and white monochrome pre-set that will turn your images black & white in a subtle way. The best thing about this filter is that it doesn’t even lose contrast and shadow details in your images.

These are all the free VSCO filters that we think can completely change your photos and make them look appealing. We would strongly recommend you try the above-mentioned VSCO filters in order to enhance your Instagram feed.

However, there are some paid-for VSCO filters that you can also try if you take the app’s premium membership. Some of the best premium VSCO filters are:

HB1 – for a dramatic and grit look.

A6 – for adding clean brightness and warmth look to your image.Dog 1Dog 2, and Dog 3 filters – you can use these filters for muting vibrant colors, boosting yellow hues and brightness, enhance purple-pink hues in your image respectively.

Wilder Zayn  is a self-professed security expert; he has been making the people aware of the security threats. His passion is to write about Cyber security,cryptography, malware, social engineering, internet and new media. He writes office.com/setup security products.

Source: https://go-officecom.com/enhance-your-instagram-feed-with-these-fantastic-vsco-filters/

Friday 12 March 2021

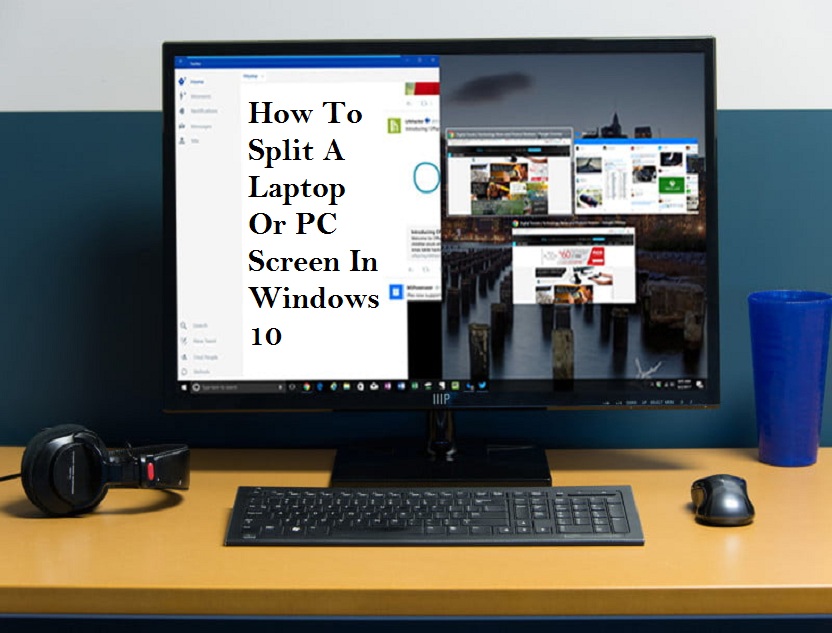
How To Split A Laptop Or PC Screen In Windows 10

 Nowadays, many people use two monitors while using a computer to perform tasks more

efficiently. And the same thing you get when you use split-screen features on your PC. On
split-screen mode, your computer screen gets divided into two halves and makes you feel like you are using two different monitors simultaneously. 

This guide will teach you how to split a Windows 10 laptop or PC screen to manage several tasks efficiently. The newer version of Windows 10 provides different ways for splitting the screen into more than one window with a higher-resolution. Let’s see the ways to split a screen in Windows 10. 

Use Snap Assist

Snap Assist is an excellent tool provided by Windows 10 for splitting screens. Follow the below steps to take advantage of it. 

 Select a window that you have to snap to one half of the display and take the window to the edge by dragging. 

 You will see a translucent outline that will help your snap. Go through it to snap the window. 

 The alternate way to snap the selected window is to tap and hold the Windows key and the Left or Right Arrow key. 

 If different windows or apps have opened and you are snapping a separate window, you will have many options to fill out the second half. Hit the one, and it gets snapped automatically at the opposite to the first window. If the selection grid vanishes, stretch the second window to the edge. 

 If you want to alter the size of the two windows, take the mouse pointer near the divider to see two arrows. Right-click and hold, and stretch the divider to resize the windows based on your needs. You can make a window narrow in a limited way. 

Use the keyboard shortcut
Using a keyboard shortcut, you can easily split the screen. Open a window and use the Windows key and Left or Right Arrow key to split the active window. 

How to snap more than two windows
If you use a large display, you have an opportunity to split it up to four windows through Corner Snap. Here is how to do it.

 Take the first window into a corner through drag and drop.

If you want to use the keyboard shortcut, use the Windows key and Left or Right Arrow key to snap the window to left or right. And use the Up or Down Arrow key to snap the window to the top or bottom. 

 Take the first open window in a corner, and then you have to drag and drop the second window to any available corner.

 Do the above step for other available corners. 

Customizing grids with a third-party app

Different third-party apps are available for more customization. These apps allow you to do grid-like changes to windows, providing you many useful tools with the right size. So, we recommend you to go with AquaSnap that is loaded with huge features. With this app, you can create many split screens according to your need, just with an easy-to-use snap function that works similar to Windows 10. You can also snap small windows to make one. The free version of this app allows you to do basic activities, including snapping, docking, stretching, using many keyboard shortcuts, and more.

Wilder Zayn  is a self-professed security expert; he has been making the people aware of the security threats. His passion is to write about Cyber security,cryptography, malware, social engineering, internet and new media. He writes  norton.com/setup  security products.

Source: How To Split A Laptop Or PC Screen In Windows 10


Tuesday 9 March 2021

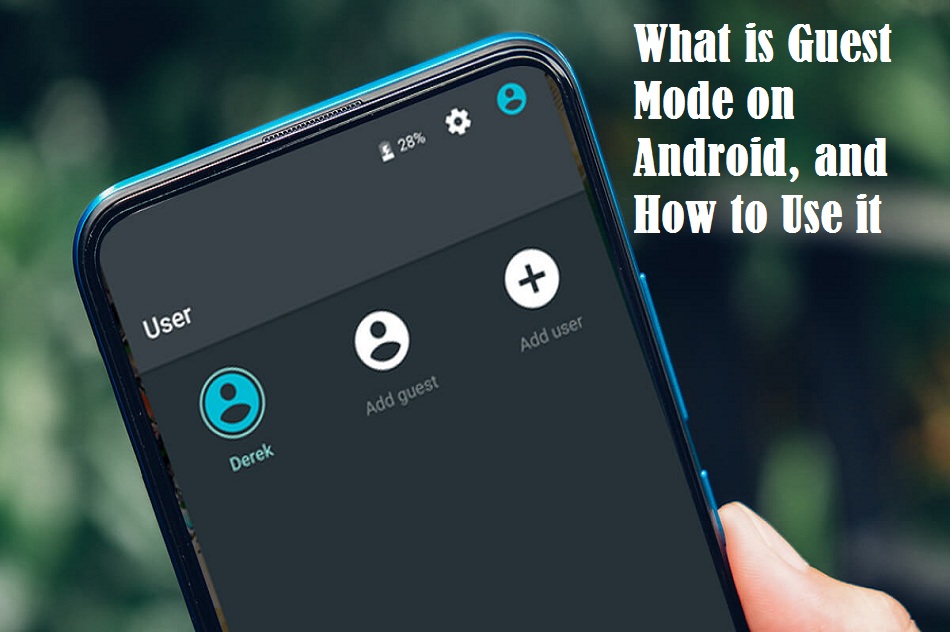
What is Guest Mode on Android, and How to Use it

 Guest mode is an excellent feature on Android devices that allows you to create a temporary account for a new user. Through guest mode, you provide separate access to your phone to another user. While accessing an Android phone in guest mode, the user will not be able to see any of the owner’s activity on the phone. The user will need to make a fresh start by setting up the phone like a new one. Moreover, if you are here to learn how to set up and use guest mode on your Android phone or tablet, keep reading this article.

The direction mentioned in this post will work on Android 5.0 (Lollipop) or higher. Remember that guest mode doesn’t support some Android devices.   

What is Guest Mode?

When you turn on guest mode on your phone and give it to a new user, they can only use some applications like Gmail, Google Chrome, Google Maps, etc. The guest mode works on your device by creating a separate account for you (Owner). And when you give your phone to a new user, and the user switch to guest mode, all your (Owner) data such as contacts, messages, photos, and all the things linked with your Google account disappears. 

The guest user can use the device using their Google account and install apps from the Play Store. If the app that guest user wants to install is already available on your phone, the app will also appear under the new profile requiring a fresh start. The new user can return to the primary account any time if you have not set a PIN or password lock on your phone. 

How to turn on guest mode on Android

The steps of turning on guest mode may vary based on the device’s manufacturer and Android version. These steps will work on most Android phones and tablets.   

  • Open the notification drawer from the top of the device by swiping. Make sure that you have completely stretched the drawer.  
  • Look at the top of the screen in the right corner and hit on your profile icon.
  • After clicking on the profile icon, hit on the Guest option to use guest mode. 
  • Under guest mode, all apps will appear that come pre-installed on your phone.   

You will need to allow calls in guest mode on some devices by hitting on the settings icon located near Guest. 

How to disable guest mode

If you want to see your phone in the original state, open the notification drawer by swiping and hit on the Owner or Remove guest option.

  • If you click on Owner, the guest user will be able to use your device from where they left last time. 
  • In the case of the Remove guest option, all guest usage will be erased from the phone. You will find your device at the lock screen. 

How to add a new user on your Android phone

If you often share your device with someone like your family member or friend, you get an option to create a permanent guest account. Here is how to do it. 

  • As always, open the notification drawer from the top of the screen and make sure that it has been completely stretched. 
  • Hit on your profile icon.
  • Choose Add user instead of Guest. 
  • The user will need to use their own Google account. 
  • The new user will have to set up the device like a new one.   

How to access guest mode on other Android phones

If you don’t find guest mode on your device using the above methods, you may need to use different steps. 

  • Open Settings.
  • Find Users.
  • And look for Guest options. 

OR, 

  • Go to Settings.
  • Tap on System.
  • Select Advanced and find Multiple Users.
  • Try looking for User or Guest in settings. 

Wilder Zayn  is a self-professed security expert; he has been making the people aware of the security threats. His passion is to write about Cyber security,cryptography, malware, social engineering, internet and new media. He writes mcafee.com/activate security products.

Source: https://sortmcafee.com/what-is-guest-mode-on-android-and-how-to-use-it/

What Is House party And How To Use It

 There are many apps like Skype, Hangouts, Messenger, etc., that facilitate human interaction remotely through video, audio, or text chat services. Also, there are many services, allowing you to work from home. But here is an app called House party, which helps you socialize with friends or family while staying at home. That means you are now going to have some fun by doing chit-chat or playing games. 

Like other video chat apps, Houseparty is also a video chat app, but the thing thatdifferentiates it from other video chat applications is its intent to build. Houseparty enables you to create a virtual space to start a party at home. Through this app, you can connect with your friends to start a video chat. Unlike other video chat apps, Houseparty allows you to play games together like heads up, trivia, and more.  

Getting started with Houseparty

To get started with Houseparty, you will need to download the app. The app is available for Android, iOS, macOS and Chrome. You can download the app or go with the Chrome web app. 

Once you download the app from the platform of your choice, you will need to create an account with Houseparty. You can quickly sign-up by using your details like name, email, and date of birth. You will also have to make a password and verify your phone number. 

Add friends

After signing up successfully, you get options to add friends of your choice. You can click on the smiley face located in the upper right corner and choose Add Friends. You can also take the help of the + icon found in the upper right corner. It is not difficult to find friends at Houseparty. You can get friends from social sites like Facebook or Snapchat by linking your Houseparty account with them. You can also add friends from your device contacts or the people available in your nearby. 

Starting a house party

After setting up your account and adding friends, you can now start a party with your dear ones. Before you start, dress yourself up in some good clothes and then start the party. Launch the app on your device to start a video chat. As you open the app, the camera and microphone of your device get activated. Now people can join the party. 

You can also contact a particular person by pressing the phone icon next to the contact. Houseparty allows you to add up to eight people at once.

Some excellent features of Houseparty

Look the room

This feature is designed to stop people from joining the party. 

  • Find the small lock icon located at the lower part of the screen.
  • Hit the icon to stop the room access. Click the lock icon again to remove the restriction. 

Play games

  • Being at a party, find a dice icon from the upper right corner.
  • Hit this icon and choose a game to play.

Link to Fortnite

  • Find the monitor icon that contains an F in the middle located in the upper left corner. 
  • Hit the icon to open the room.
  • Connect your Fortnite account with your PlayStation or PC. 
  • Now you are all set to play and chat.

Sharing your screen

You can also share the screen with someone based on the device you use. This feature helps when you use a device other than a smartphone. 

  • Under the Houseparty video chat, find a monitor icon. 
  • Hit the monitor icon.
  • Decide what you wish to share, like the whole screen, browser tab, and anything else. 
  • Click the button called Share. 

Send Facemail

  • Open your contacts list.
  • Choose the user you have to send a Facemail. 
  • Hit the shutter button and hold it during recording. 
  • Finally, hit the send button. 

Wilder Zayn  is a self-professed security expert; he has been making the people aware of the security threats. His passion is to write about Cyber security,cryptography, malware, social engineering, internet and new media. He writes office.com/setup security products.

Source: https://mynew-office.com/what-is-house-party-and-how-to-use-it/

How to Use Time to Walk Feature in Apple Fitness Plus?

Apple use to add several new services and apps to its health and fitness device that is Apple Watch. The company has recently introduced an ...