Showing posts with label Windows 10. Show all posts

Friday, 12 March 2021

How To Split A Laptop Or PC Screen In Windows 10

 Nowadays, many people use two monitors while using a computer to perform tasks more

efficiently. And the same thing you get when you use split-screen features on your PC. On
split-screen mode, your computer screen gets divided into two halves and makes you feel like you are using two different monitors simultaneously. 

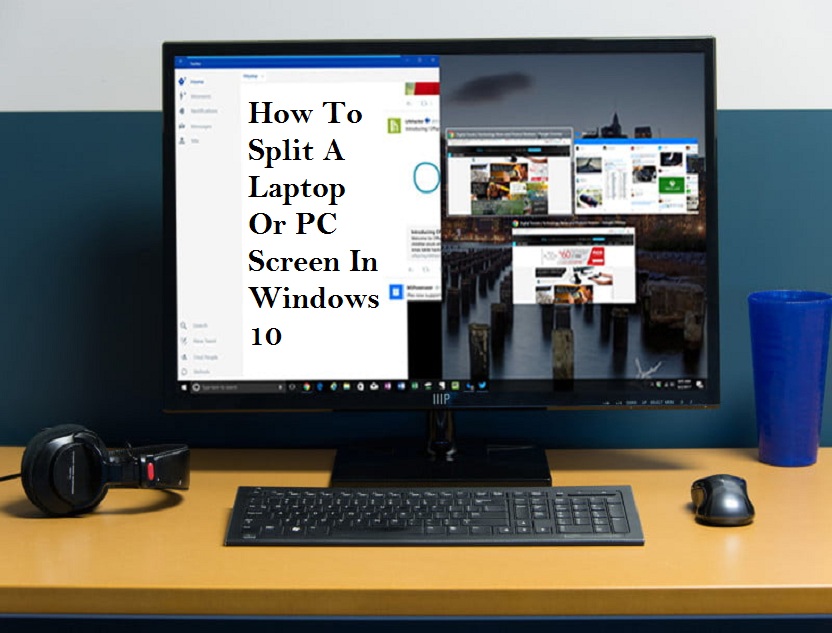
This guide will teach you how to split a Windows 10 laptop or PC screen to manage several tasks efficiently. The newer version of Windows 10 provides different ways for splitting the screen into more than one window with a higher-resolution. Let’s see the ways to split a screen in Windows 10. 

Use Snap Assist

Snap Assist is an excellent tool provided by Windows 10 for splitting screens. Follow the below steps to take advantage of it. 

 Select a window that you have to snap to one half of the display and take the window to the edge by dragging. 

 You will see a translucent outline that will help your snap. Go through it to snap the window. 

 The alternate way to snap the selected window is to tap and hold the Windows key and the Left or Right Arrow key. 

 If different windows or apps have opened and you are snapping a separate window, you will have many options to fill out the second half. Hit the one, and it gets snapped automatically at the opposite to the first window. If the selection grid vanishes, stretch the second window to the edge. 

 If you want to alter the size of the two windows, take the mouse pointer near the divider to see two arrows. Right-click and hold, and stretch the divider to resize the windows based on your needs. You can make a window narrow in a limited way. 

Use the keyboard shortcut
Using a keyboard shortcut, you can easily split the screen. Open a window and use the Windows key and Left or Right Arrow key to split the active window. 

How to snap more than two windows
If you use a large display, you have an opportunity to split it up to four windows through Corner Snap. Here is how to do it.

 Take the first window into a corner through drag and drop.

If you want to use the keyboard shortcut, use the Windows key and Left or Right Arrow key to snap the window to left or right. And use the Up or Down Arrow key to snap the window to the top or bottom. 

 Take the first open window in a corner, and then you have to drag and drop the second window to any available corner.

 Do the above step for other available corners. 

Customizing grids with a third-party app

Different third-party apps are available for more customization. These apps allow you to do grid-like changes to windows, providing you many useful tools with the right size. So, we recommend you to go with AquaSnap that is loaded with huge features. With this app, you can create many split screens according to your need, just with an easy-to-use snap function that works similar to Windows 10. You can also snap small windows to make one. The free version of this app allows you to do basic activities, including snapping, docking, stretching, using many keyboard shortcuts, and more.

Wilder Zayn  is a self-professed security expert; he has been making the people aware of the security threats. His passion is to write about Cyber security,cryptography, malware, social engineering, internet and new media. He writes  norton.com/setup  security products.

Source: How To Split A Laptop Or PC Screen In Windows 10


Wednesday, 24 February 2021

How to Merge Disk Partitions in Windows 10

 In this article, we have discussed the ways using which you can merge disk partitions in Windows 10. While it always proves to be helpful to obtainvarious partitions on a hard disk for varied uses, it might sometimes be a requirement to merge the disks into one contiguous unit. Whatsoever may be the reason, with the help of the steps listed below, you can merge several partitions into a single unit on your PC. So, if there’s a need to merge disk partitions on your Windows 10 PC, you can go through the instructions listed below. We have listed three steps using which you can carry the task: with the help of “Disk Management” – the built-in Windows tool, using “DiskPart” – a command-line tool, andAOMEI Partition Assistant – a third-party app.

Merge Multiple Hard Disk Partitions in Windows 10

Your Windows 10 PC has a built-in partition management utility using which you can combine or merge several partitions. The built-in tool is called Disk Management. However, third-party tools like AOMEI Partition Assistant can also be used. To merge or combine the disk partitions, you can also make use of “DiskPart” – a command prompt. For each listed method, you getvaried pros andcons. So, this article will tell you which method you exactly need to fulfill the purpose. So,let’s get started with the instructions to merge or combine partitions into one contiguous unit on your Windows 10 PC.

Please be noted that some of the below-mentioned methods lead to complete data loss. So, we recommend you take the backup of your PC first before you proceed further. With that said, let us proceed further to the instructions to merge multiple disk partitions into one on a Windows 10 PC. We have mentioned three methods using which you can accomplish the task. They are as follows:

Using Disk Management (Data Loss)

Using this method will lead to data lossso, you need to create a complete backup of your Windows 10 PC before you proceed further using this method.

  1. Initiate the process by heading over to the Control Panel.
  2. Further, in the control panel settings, you need to look for the option “Disk Management.”
  3. Now, you need to tap on the option “Create and Format Hard Disk Partition,” from the results.
  4. Navigate to the two partitions that need to be merged, and further, delete the one appearing on the right side. For instance, if you want to combine/merge D: and E: drive on your system, you need to first delete E: drive. You can do that by right-clicking on the partition E: and further selecting the option “Delete Volume.”
  5. A warning promptstating “All the data will be lost” will appear on your screen. To continue further, you need to click on “Yes.”
  6. Then, right-tap on the volume D: and further press“Extend Volume.”
  7. The“Extend Volume Wizard” will appear on your screen, using which you can expand the disk as desired.Further, start the process by clicking on “Next.”
  8. Then, agree with the default options and tap on “Next.” Do make sure you don’t change any value.
  9. Finally, press“Finish” so as to completely merge the two partitions into a single disk. That’s it.

Using Third-party App (Without Data Loss)

We are going touse AOMEI Partition Assistant so that you can understand better the instructions listed in this method.

  1. First, you need to download and install AOMEI Partition Assistant. You can download the app for free.
  2. Once you have downloaded it, right-click on that partition whose size needs to be increased. Further, you need to choose the option “merge Partitions” from the popup menu that appears on your screen.
  3. Thenchoose the partition that needs to be addedto the parent partitionand furtherselect the volume level, and then press ‘OK’ to continue.
  4. That’s it. You have successfully merged two partitions on your Windows 10 PC without any data loss.

Using DiskPart (Data Loss)

Below are the steps mentioned on how you can make use of DiskPart (a command-line tool), for merging two partitions on your Windows 10 PC:

  1. On the Windows Search Bar, you need to type“diskpart.exe” hit the Enter button.
  2. Further, type the text “list volume” on the command line window that appears on your screen. Press Enter to continue.
  3. Then, type“select volume <label>”and press Enter.
  4. Further, type“delete volume”so as to make that specific volume all-set for a merger.
  5. Then,choose the partition that needs to be extended. For that, you need to type“select volume <label>”so as to shift the focus to thatspecific volume.
  6. Finally, you need to extend this partition by typing“extend.”Themessage stating “DiskPart successfully extended the volume” will appear on your system in an instance.That’s it. You have successfully merged your D: drive and E: drive into one.

So, these were the methods using which you can easily merge Hard Disk partitions onyour Windows 10 PC. We hope that now you have a good understanding of how to combine or merge partitions using third-party tools like AOMEI Partition Assistant, the DiskPart, and the built-in Disk Management tool. Do express your honest opinion about this topic and if you are facing any issue, state it in the comment section below:

Wilder Zayn  is a self-professed security expert; he has been making the people aware of the security threats. His passion is to write about Cyber security,cryptography, malware, social engineering, internet and new media. He writes norton.com/setup security products.

Source: How to Merge Disk Partitions in Windows 10

How to Install Hyper-V on Windows 10 Home

In this article, we have discussed the ways using which you can install Hyper-V on Windows 10 Home. Windows 10 has been working on its own Virtual Machine in order to bring a built-in VM capability on Windows. Similar to several otherVMapps, Hyper-V allows users to run a vast number of operating systems on top of Windows 10. While it’s magnificent to use such a VM capability, the only issue with Hyper-V is that it is not available on Windows 10 Home. So, we have come up with a workaround that will let you install Hyper-V on your Windows 10 Home PC. Follow the steps mentioned below for the same:

Install Hyper-V on Windows 10 Home

To install Hyper-V on Windows 10 Home, you need to follow the steps mentioned below:

  1. First, download the batch file in order to turn on Hyper-V for your Windows 10 Home. TheWindows 10batch file is developed bythe developers at Microsoft Virtualization.

  2. Further, choose “Run as Administrator” by right-clicking on the batch file.

  3. The Power Shell/Command Prompt window will open, and the installation of Hyper-V will begin on Windows 10 Home. Please make sure you are connected to the internet in order to enable this feature.

  4. After installing Hyper-V, you need to restart your PC. Further, press together “Windows” and “R” keys simultaneously in order to open the Run window.

  5. Now, type optionalfeatures.exe and press enter.

  6. The Windows Features screen will get displayed on your screen. Now, you need to scroll below to enable all the Hyper-V checkboxes and press OK to continue. This will initiate the installation of the necessary packages, and further, it will ask you to restart your PC after the installation is completed.

  7. Hyper-V will get activated on your Windows 10 Home once the installation finishes up. Now you can simplypressthe Windows key and search for “Hyper-V.” Doing this will show you the results from which you need to go to Hyper-V and open it.
  8. In case Hyper-V doesn’t appear in the search result, you need to open the Run window andtype virtmgmt.msc, and press enter. Doing this will open Hyper-V Manager on your Windows 10 Home PC.

So, these were the steps using which you can enable Hyper-V on your Windows 10 and create virtual machines. That’s all from us for now. Please let us know in the comment sectionif you face facing any issues.

Wilder Zayn  is a self-professed security expert; he has been making the people aware of the security threats. His passion is to write about Cyber security,cryptography, malware, social engineering, internet and new media. He writes office.com/setup security products.

Source: How to Install Hyper-V on Windows 10 Home


Saturday, 20 February 2021

How to Create the Background Transparent on MS Paint on Windows 10

MICROSOFT PAINT IS ONE OF THE MOST TRADITIONAL APPLICATIONS, and it is quite useful even now. It is pretty lightweight and capable of removing the background of your photos. If you wish to create a transparent background on your photos using Microsoft Paint, you can do this easily on Windows 10 as well. If you do not know how to make this happen, just follow the instructions we have provided in this article.


You will surely be able to make the background blank in your photos using Windows 10 Paint app.

Let’s dig in.

Removing Background Using MS Paint App

There are fundamentally two methods to make this happen. The first method is about cutting the foreground area from a picture and leaving the rest of the surrounding image as it is. Later you can paste the cut image to a new background image.

The second way is about deleting a particular area from the picture to form the transparent background. We will learn both of these methods in this article.

1. Creating Transparent Background with MS Paint

  1. First of all, navigate to the Paint application on your Windows 10 computer.
  2. Now click on the File option on the top left corner.
  3. Click the Open button to browser an image.
  4. Once the image is loaded, click on the Select option from the toolbar.
  5. Choose the Transparent selection.
  6. Then choose the Free Form selection.
  7. Now carefully use this tool to select your object that you want to remove from the image.
  8. Once you have selected the area, please perform a right-click inside the rectangular shape that appears after selecting the object.
  9. Now select the Cut option from the given list.
  10. It will automatically remove the selected area from your image.
  11. Next, you need to open a new image using MS Paint app.
  12. Now quickly press the Control + V keys on your keyboard.
  13. Your targeted object will automatically appear.
  14. You have successfully removed the background and made it transparent.
  15. This is what you actually wanted.

Now you have understood how to make a photo’s background transparent on the Paint app. You can also learn the next method.

2. Create Transparent Background Using Paint

This is the second option to remove an image’s background using the Paint app on your computer. In this method, we are going to use the Paint 3D application that comes in all Windows 10 computers.

Here is what you need to do:

  1. Open the start menu and then search for Paint 3D.
  2. Select the paint 3D application and open it.
  3. As the app loads, find and select the Menu button.
  4. Click on Open and then select the Browse Files option.
  5. Select the Canvas icon to browse the sidebar.
  6. Turn on the Transparent Canvas.
  7. Click on the Select button.
  8. Now make a selection of the object in the image for which you wish to clean the background.
  9. Once you have selected the main object in the image, tap the Control + X keys on your keyboard to remove the image’s object.
  10. Now go to Menu and then select the Save As option.
  11. Go for the 2D PNG option.
  12. In the textbox, please provide a file name and then hit the Save button.
  13. Again, go to Menu and select New.
  14. This will open a new window of MS Paint 3D.
  15. Click on Menu, then select Open.
  16. Click the Browse Files option and then select the photo that you wish to use as a background for your copied object.
  17. Once you have opened the file, go to Menu and then click Insert.
  18. Find and select the file that you created a moment ago.
  19. The transparent image that you saved previously will appear on your newly added image.
  20. Now you can see two layers on the Paint application.
  21. You can resize the photo using the given options.
  22. Then please try to fit the transparent object into the background.
  23. Once you are satisfied with the settings, please save the file.
  24. Congratulations, you have added a new background to your image.

That is how to remove a background of a photo on the Windows 10 Paint app. We hope you have liked this article and found it informative.

Wilder Zayn is a self-professed security expert; he has been making the people aware of the security threats. His passion is to write about Cyber security,cryptography, malware, social engineering, internet and new media. He writes office.com/setup security products.

Source: How to Create the Background Transparent on MS Paint on Windows 10

Thursday, 19 November 2020

Forza Horizon 4 Game Crashes on Windows 10? Here’s How to Fix it

Forza Horizon 4 is one of the most popular racing video games across the globe. It has been published by Microsoft Studios. You can play it on MS Windows and Xbox One. It offers you a thrilling experience and improves your gaming skills. But some users are reporting that whenever they start the game, it crashes on Windows 10. So, if you are dealing with the same issues, then here are a few solutions you can try.

Repair Folder Bug via File Explorer

  1. Firstly, launch the installation folder of Forza Horizon 4.
  2. Thereafter, open the folder of FH4.
  3. You should scroll down to locate the folder of bugs. It will be named Microsoft.SunriseBaseGame.
  4. Later, delete the .exe file from the folder name.
  5. Now, try to launch the game again.

Stop Audio Input Associated Services

  1. Hit on the Windows icon to invoke the Search section.
  2. Then insert ‘Run’ in it and select the OK button to open the Run prompt.
  3. Thereafter, insert ‘msconfig’ into it and select the OK button.
  4. You will see a prompt on your screen, click on the tab of Services.
  5. After that, untick the box of Nahimic service.
  6. Later, untick the ‘Realtek Audio Universal Service’ box and then select the OK button.
  7. Finally, reboot the system.

Register Forza Horizon 4 via the Windows PowerShell

  1. First, you need to go to the Search section.
  2. Afterward, insert the ‘windows power shell’ in it and select the OK button.
  3. Then choose the ‘Run as Administrator’ option.
  4. You should copy the following command and hit the Enter button: Get-AppxPackage -AllUsers | Select Name, PackageFullName
  5. After that, move down to locate the ‘Microsoft.SunriseBaseGame’ folder and then copy it. It will display the executable files list on the system.
  6. Thereafter, insert ‘Remove-AppxPackage’ in it and paste the copied file name, followed by a space, and then hit the Enter key.
  7. Later, insert ‘cd’ into it, and the game installation directory address followed by a space then hit the Enter button. It will launch the installation directory of Forza Horizon 4 in Windows PowerShell.
  8. You have to copy the following command and then hit the Enter key: Add-AppxPackage -Register AppxManifest.xml
  9. Now, shut the Windows PowerShell screen and then reboot the system.
  10. Finally, open the game.

Whenever Forza Horizon 4 crashes on your system, simply follow the steps mentioned above and fix the issue.

Emily Johnson is a Microsoft product expert and has been working in the technology industry since 2002. As a technical expert, Emily has written technical blogs, manuals, white papers, and reviews for many websites such as office.com/setup.

Source:  Forza Horizon 4 Game Crashes on Windows 10? Here’s How to Fix it

Thursday, 13 August 2020

How to Disable Task View on Windows 10?


Task View is a potent system that offers a convenient way to switch between running programs and work with virtual desktops. This handy feature was introduced in Windows 10. However, some users do not like this task switcher and virtual desktop system. They can easily disable the task view by following the steps given below.

Remove the Button

You should pursue these instructions given below:

  1. Go to the taskbar and right-click on it to launch the menu.
  2. Thereafter, click on the option of ‘Show Task View’.
  3. You should select it again to disable it.

Turn off the Swipe Feature

You should pursue these instructions given below:

  1. You should log in as an administrator, and launch the Local Group Policy Editor option by inputting it into the Search section.
  2. Scroll down and choose the ‘Computer Configuration’ option.
  3. Go to the menu, and choose the ‘Administrative Templates.’
  4. Click on Windows Components.
  5. You have to reach the last drop-down and open a folder labeled Edge UI.
  6. Navigate to the right-hand side panel, select the ‘Allow edge swipe’ option to edit the function.
  7. Now, choose the Disable option and select the ‘Close the window’ option.
  8. Reboot the device.

Tweak the Registry to Turn off Task View

You should pursue these instructions given below:

  1. Hold down the Windows key and press R to open the run dialog box.
  2. Thereafter, insert ‘Regedit’ into it and press the Enter key to invoke the Registry.
  3. Go to:

HKEY_CURRENT_USER\SOFTWARE\Microsoft\Windows\CurrentVersion\Explorer\Advanced

  • You should reach the right-side panel of the editor and mark the ShowTaskViewButton.
  • Select the ‘ShowTaskViewButton’ and right-click on it and click on the Modify button.
  • Later, modify the Value Data from 1 to 0.
  • Now, reboot the system.

Restrict and Delete Task View Button through Windows 10 Taskbar

You should pursue these instructions given below:

  1. Hold the Windows and R keys to launch the Run dialog.
  2. Thereafter, input ‘regedit’ into it and select the OK button to invoke the Registry.
  3. Go to: HKEY_CURRENT_USER\Software\Microsoft\Windows\CurrentVersion\Explorer
  4. Make a fresh key beneath the Explorer key and change its name to MultiTaskingView.
  5. You have to make different fresh key beneath the MultiTaskingView key and change its name to AllUpView so the last key path would be:

HKEY_CURRENT_USER\Software\Microsoft\Windows\CurrentVersion\Explorer

  • Later, click on the ‘AllUpView’ key and go to the right panel.
  • Finally, reboot the system.

While you cannot remove Task View on Windows 10, you can stop the access to the feature by removing the button. Hopefully, the steps mentioned above will help you do that.

Julia Robert is a creative person who has been writing blogs and articles about cyber security. She writes about the latest updates regarding mcafee.com/activate and how it can improve the work experience of users. Her articles have been published in many popular e-magazines, blogs and websites.

Source:  How to Disable Task View on Windows 10

Thursday, 25 June 2020

How to Disable Fast Startup on Windows 10 When it’s not Appearing

In this article, you will learn how to disable the Fast Startup on Windows 10 when it is not showing in the power management options. Sometimes the Fast Boot is enabled in the background and causes several problems, but users can’t disable it. In order to turn it off, we first need to bring the fast boot option on Windows 10, so that you can turn it off. Here you will find several methods to bring fast startup on Windows 10 and then disable it.
Method 1: Using the Standard Way
You might have tried this standard method already for turning off the fast boot on Windows 10, but you should do it once again with us in the right way. Don’t worry if it doesn’t work, because we have several other ways of disabling it.  So follow the guidelines mentioned down here:
  1. First and foremost, perform Windows + D key at the same time.
  2. Now press the CTRL + ALT + DELETE keys at the same time on your device.
  3. Click on the power button on the bottom right corner of the screen.
  4. Choose the Restart button to restart your device so that the temporary issue might resolve on its own.
  5. This can be the first occasion for your device to miss its system features, particularly in case you have downloaded a new app recently on your system. 
  6. In case you have recently updated the Windows 10, chances are there that you may see this issue of fast boot.
  7. Now go to the start menu.
  8. Click on the Power button.
  9. See if there is an option saying “Fast Startup.”
 If you don’t see this option, then it means Fast Boot is still active on your device. Follow the next method to remove it.
Method 2: Inspecting the BIOS Menu
In this method, we are going to navigate to the BIOS of your system, and then we would be checking the settings if something is configured wrongly. We will ensure if all settings are apt for the normal startup.
There you might see a few options related to Fast boot to make it turn it off. However,  if you don’t see any options related to fast startup on your system, it means it is not enabled on your device so far.
Here’s how to fix the Windows 10 fast boot via BIOS:
  1. On your device perform Windows + I keys at the same time to bring the Settings window.
  2. Then head to Update & Security.
  3. Head to Recovery using the left side menu.
  4. Inside the Advanced Startup section, you should see an option named “Restart now.”
  5. Now your system will reboot to the Advanced boot menu.
  6. Head to “Advanced options”.
  7. Make your way to the UEFI Firmware Settings option.
  8. Choose Restart.
  9. Now you see several options, choose the Fast Boot to enable it. 
  10. Save the changes using the on screen instructions.
  11. Exit from there by following the on screen directions.
  12. Restart your computer.
Method 3: Using Local Group Policy Editor
The Group Policy Editor is only available on Windows 10 Pro and Enterprise versions. So if you own any other version, just skip this method.
It is one of the best system tools on Windows to change advanced system settings as per your desire. Use this tool cautionary as it is immensely powerful and you might get your OS corrupted if anything goes wrong.
You will have the safe operation as long as you are tied to our institutions mentioned down below:
  1. Hit the Windows key on your keyboard.
  2. Then, put in Group Policy.
  3. Choose the Edit group policy option.
  4. Make your way to Computer Configuration > Administrative > templates > System > Shutdown.
  5. Once you are there, right-click on the “Require use of fast startup” option located in the right side window.
  6. Select either Not Configured option.
  7. Save the changes and then close the window.
  8. Press the Windows + R key on your keyboard at the same time.
  9. Put in Control and then hit Enter.
  10. Press Ctrl + F keys at the same time.
  11. Put in Power Options.
  12. Hit the Enter key.
  13. Go to Power Options from the results.
  14. Navigate to “Choose what the power buttons do” from the left sidebar.
  15. Click on the “Change Settings that are currently unavailable” option. 
  16. Uncheck the option saying “Turn on fast start-up (recommended).”
  17. Press on the Save Changes button.
Now the Fast boot is disabled on your system from the system power options. However, it could be turned on in the background.
Method 4: Ensure that Hibernation is Turned On
Fast boot and hibernation are linked together on Windows 10, and fast restart does not work when the hibernation is turned on. This means if you want to disable fast boot, you can turn off the hibernation on Windows 10 which is rather easy.
Here’s how to re-enable the Hibernation on your device:
  1. Go to the start menu.
  2. Then type the CMD.
  3. Perform a right-click on that.
  4. Choose run as administrator.
  5. Press on yes to continue.
  6. Now once the Command Prompt appears, put in the “powercfg.exe /hibernate on” command.
  7. Hit the Enter button on your keyboard.
  8. Close the command prompt.
  9. Now turn off the  Fast Startup from the Control Panel.
  10. Go to Power Options.
  11. Then click on choose what power buttons do.
  12. Go to Change settings that are currently unavailable.
  13. Uncheck the Fast Startup option.
  14. Reboot the system.
Method 5: Using the SFC & DISM commands
You can also fix this via SFC and the DISM commands. This is because it is possible that fast startup has damaged some of the system files and that’s why you are unable to disable it. You need to first fix the system files using the System File Checker. The DISM command stands for Deployment Image Servicing and Management that repairs corrupted Windows items.
Here’s how to use these both commands to fix the damaged system files:
  1. Run the Command Prompt as admin.
  2. Now put in sfc/ scannow.
  3. Hit the Enter button.
  4. Once the scan completes, put in “DISM /online /Cleanup-Image / ScanHealth” then press Enter.
  5. Now put in “DISM /Online /Cleanup-Image /RestoreHealth” and hit the Enter key.
  6. Hold tight until the process wraps up.
  7. Reboot the system.
John Smith  is a technology enthusiast who loves writing about new advancements and IT threats on a regular basis. Her work focuses on the latest advancements in the realm of technology, social media, and cyber security at norton.com/setup.

How to Use Time to Walk Feature in Apple Fitness Plus?

Apple use to add several new services and apps to its health and fitness device that is Apple Watch. The company has recently introduced an ...